MyHome Project Walkthrough
MyHome keeps device information, receipts, warranties and manuals organized by property, making important records easier to find when they are needed. Explore the sections below to see how the application works. All screenshots contain fictitious test data, and no registration is required.
Main Dashboard
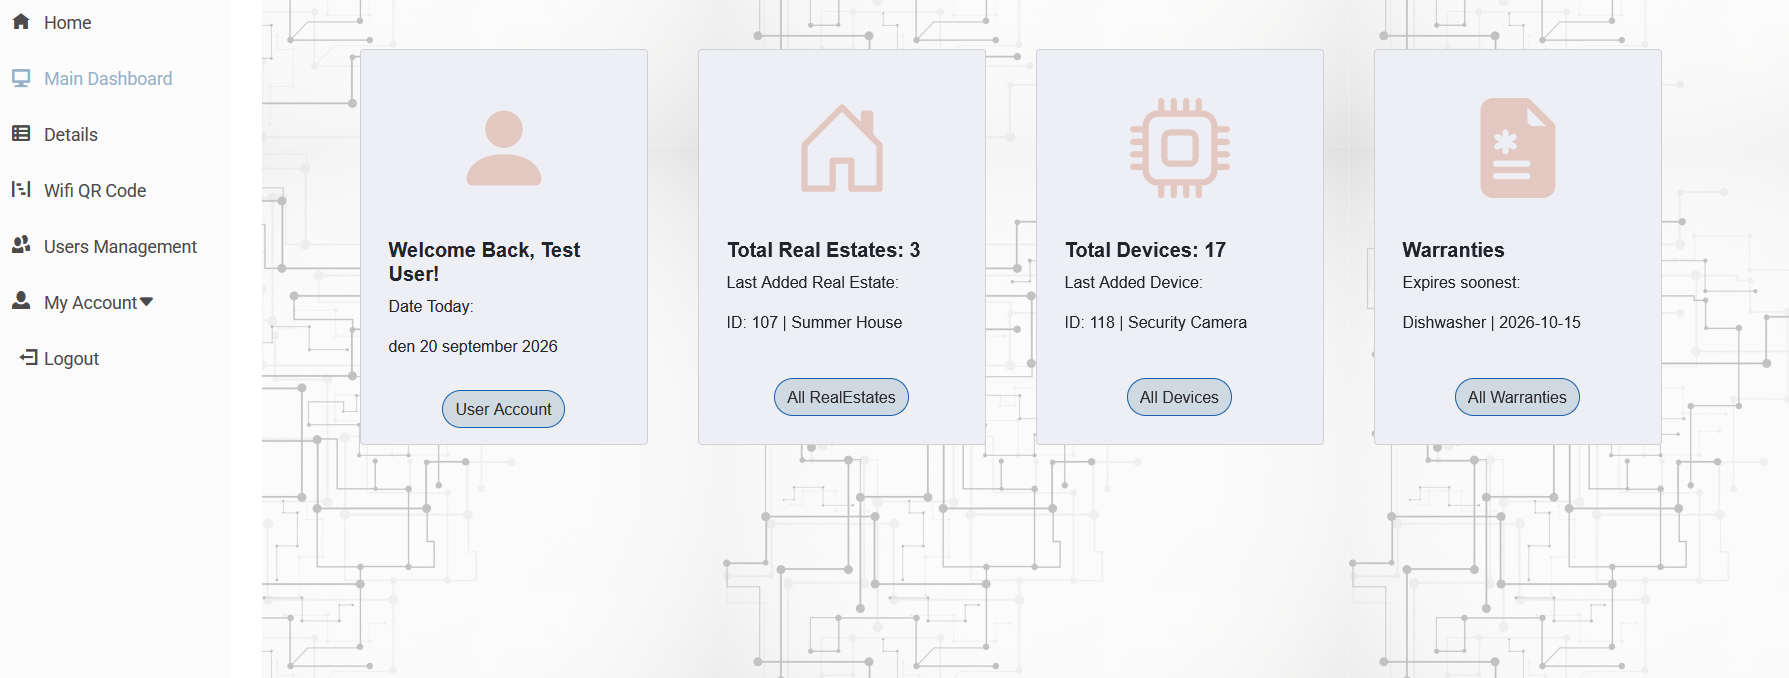
The Main Dashboard provides a quick overview of the user's MyHome data. It displays the total number of registered real estates and devices, together with the most recently added property and device. It also highlights the device with the nearest upcoming warranty expiration, allowing important information to be seen immediately after signing in.
Quick Navigation
Each dashboard card also provides direct access to the corresponding section of the application. Users can quickly open their account, real estates, devices, or warranties without navigating through multiple pages.
Real Estate Management
MyHome allows users to manage multiple real estates within a single account. Each property stores its own name and address information and acts as a container for the devices assigned to that location.

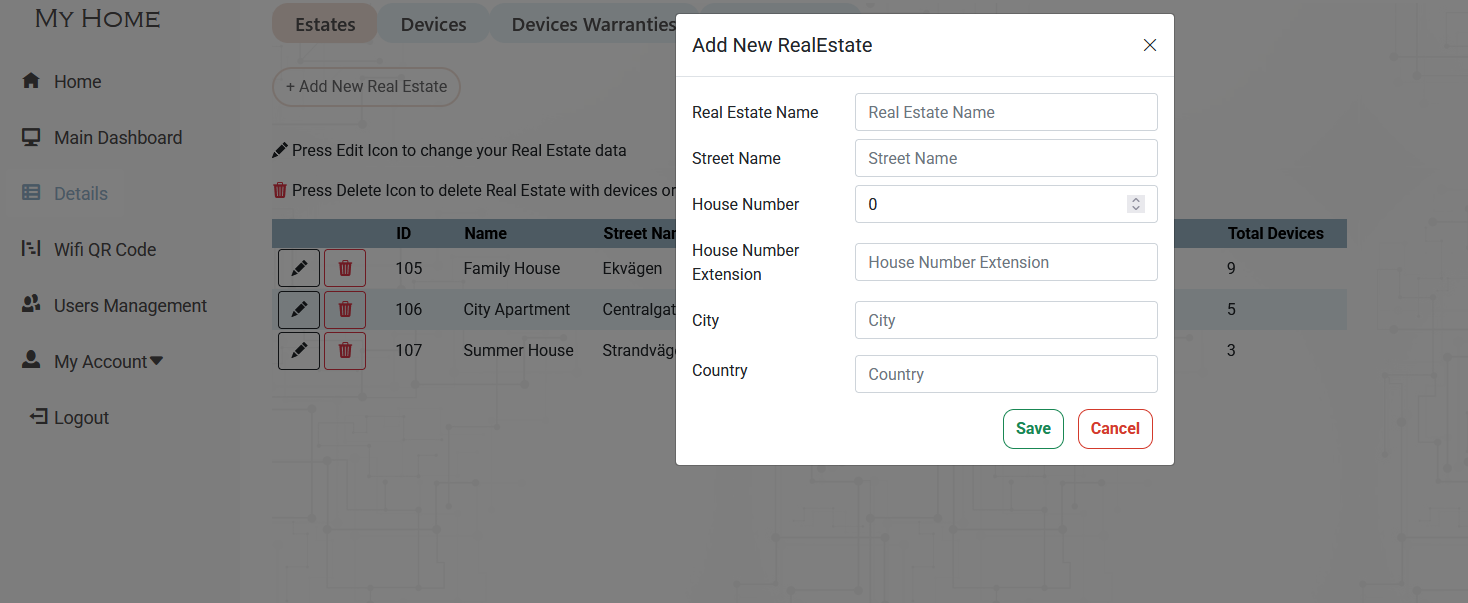
Add a Real Estate
Users can add a new property by entering its name and address. Once created, devices can be assigned to the property.
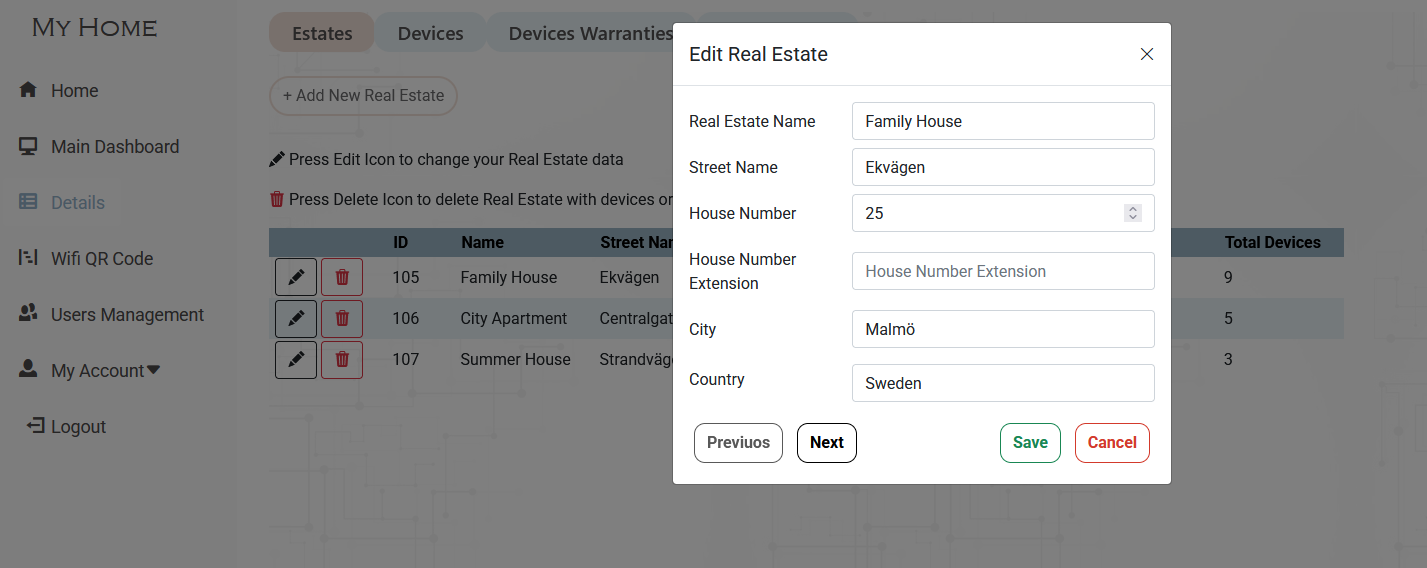
Edit a Real Estate
Existing property information can be updated at any time, allowing the user to change the property name or address.
Deleting a Real Estate
Deleting a real estate requires additional handling when devices are still assigned to it. Instead of automatically deleting those devices together with the property, MyHome allows the user to decide what should happen to them.
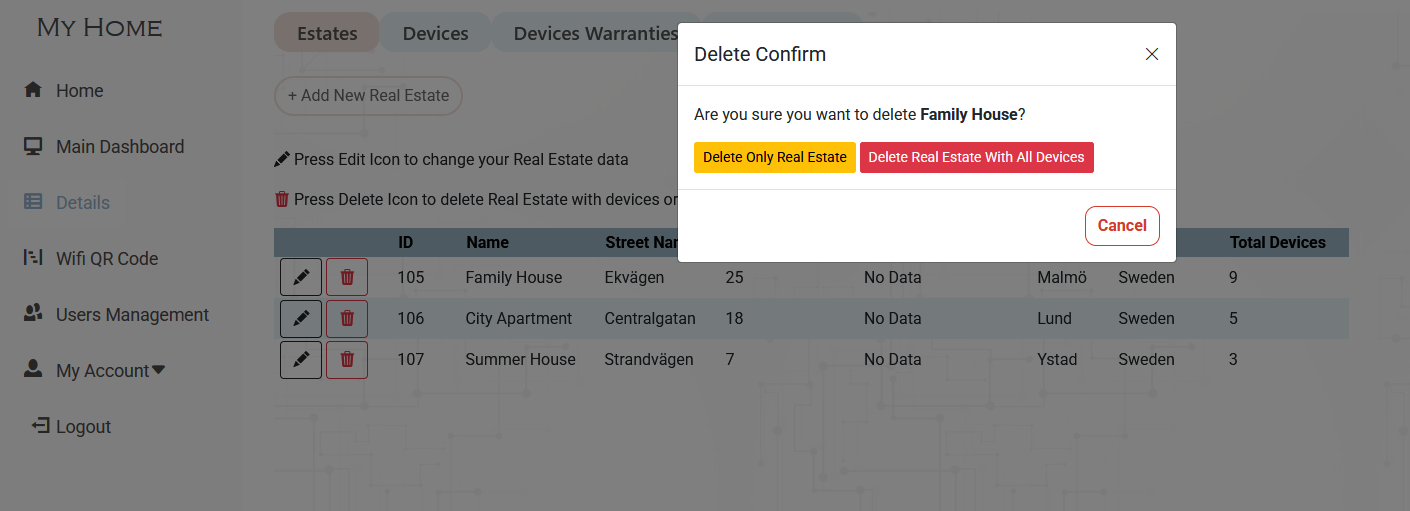
Keep or Reassign Devices
When a property contains devices, they can be kept as unassigned devices or moved to another existing real estate before the property is deleted. This prevents device information from being lost.
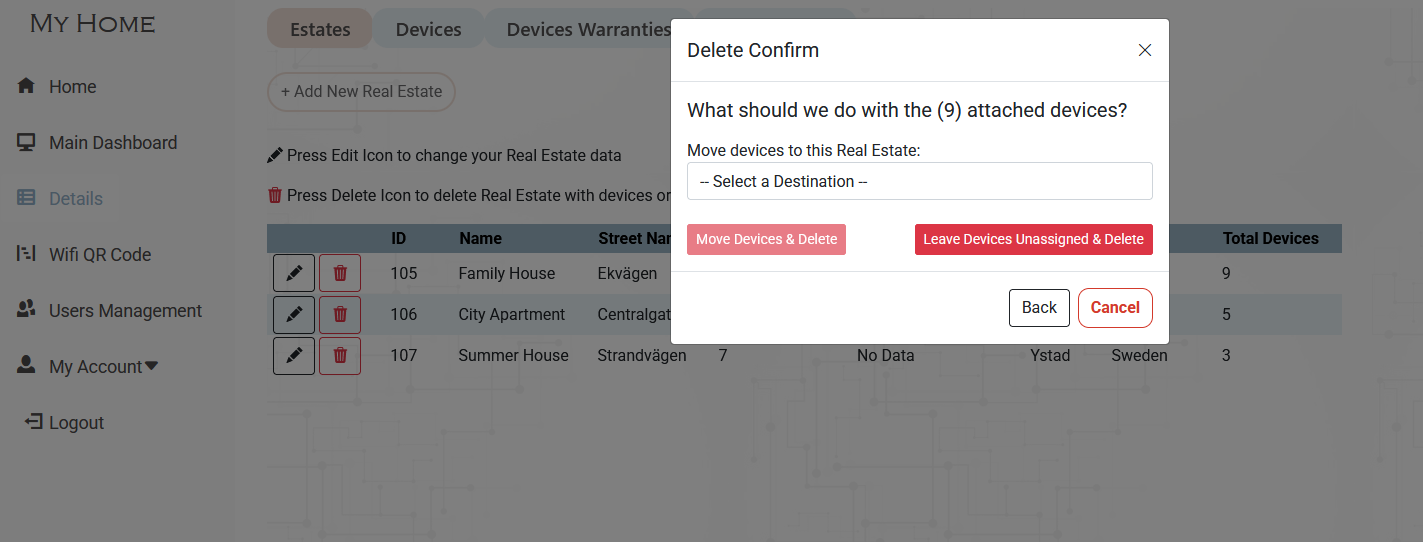
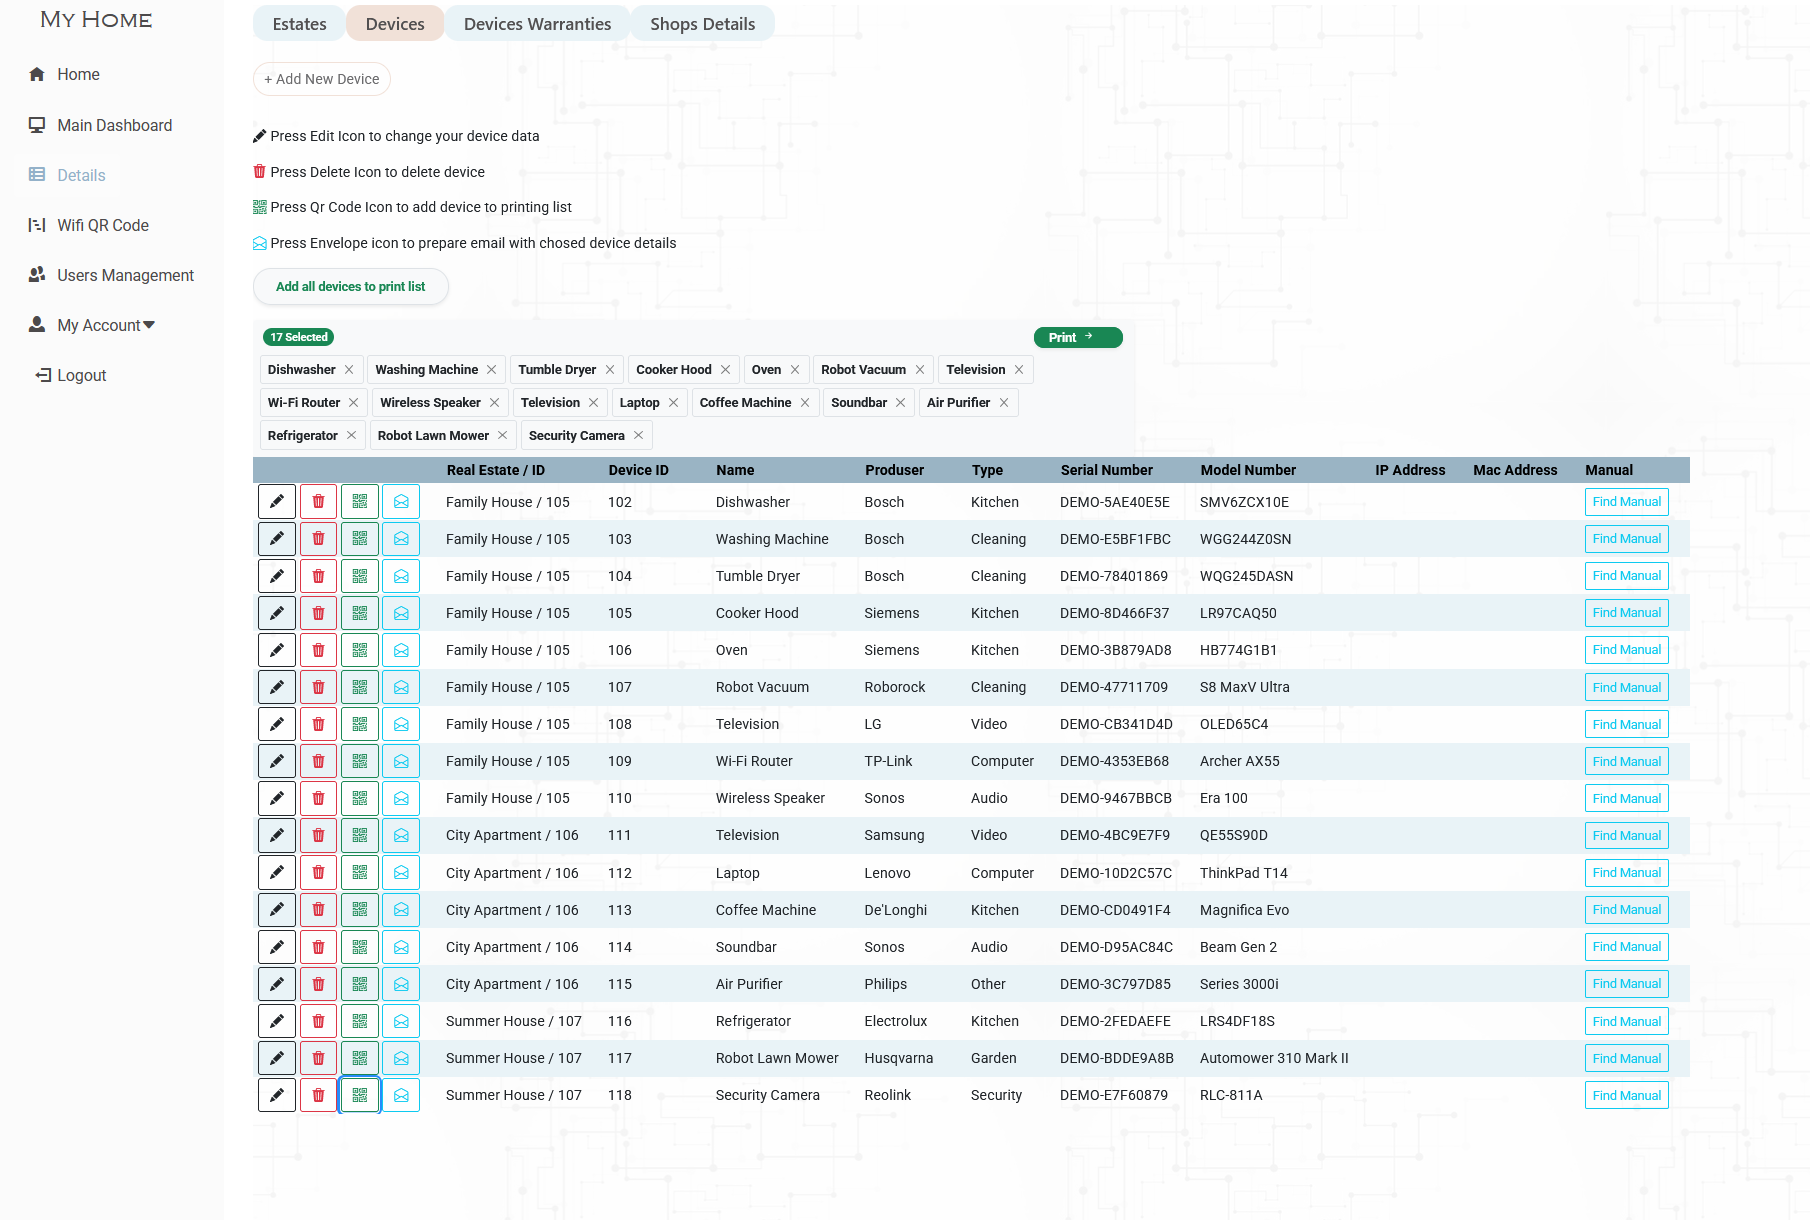
Device Management
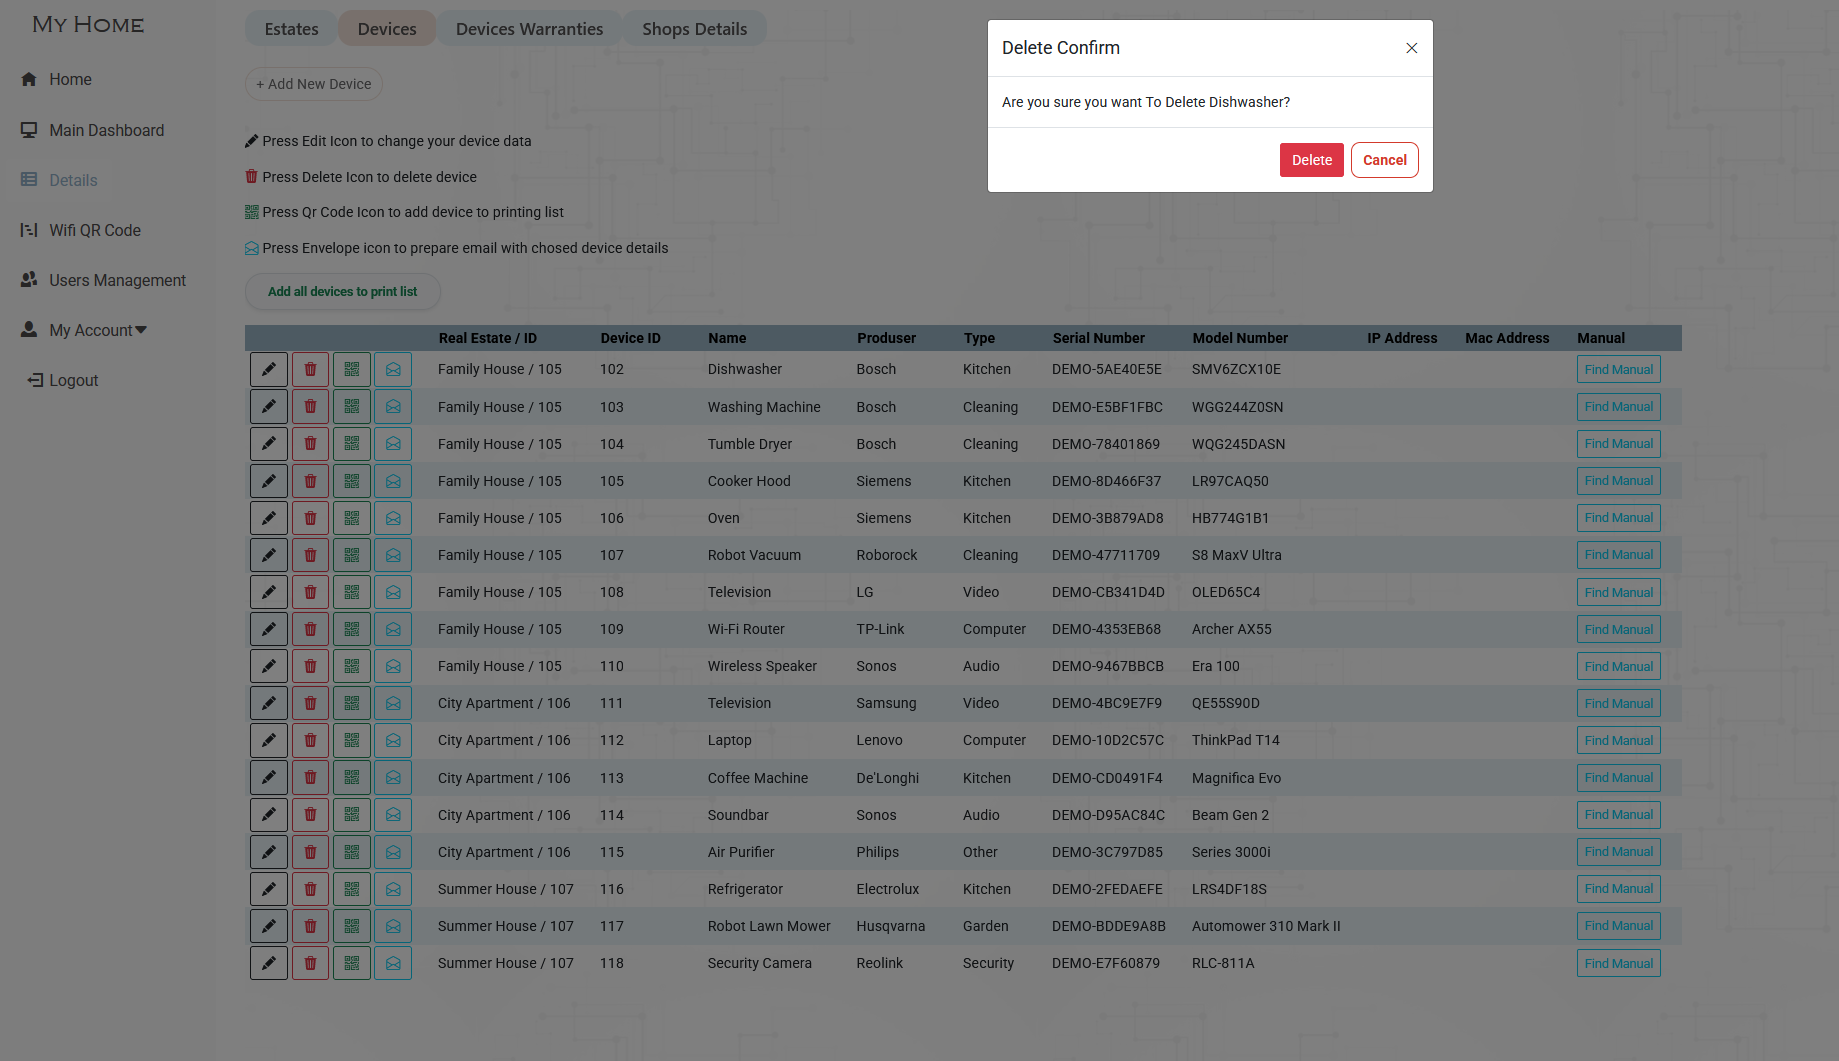
The Devices section provides an overview of all registered devices. Users can view device information, search for devices, and access actions for editing, deleting, generating QR codes, and creating emails. Devices are connected to real estates and can be managed individually.
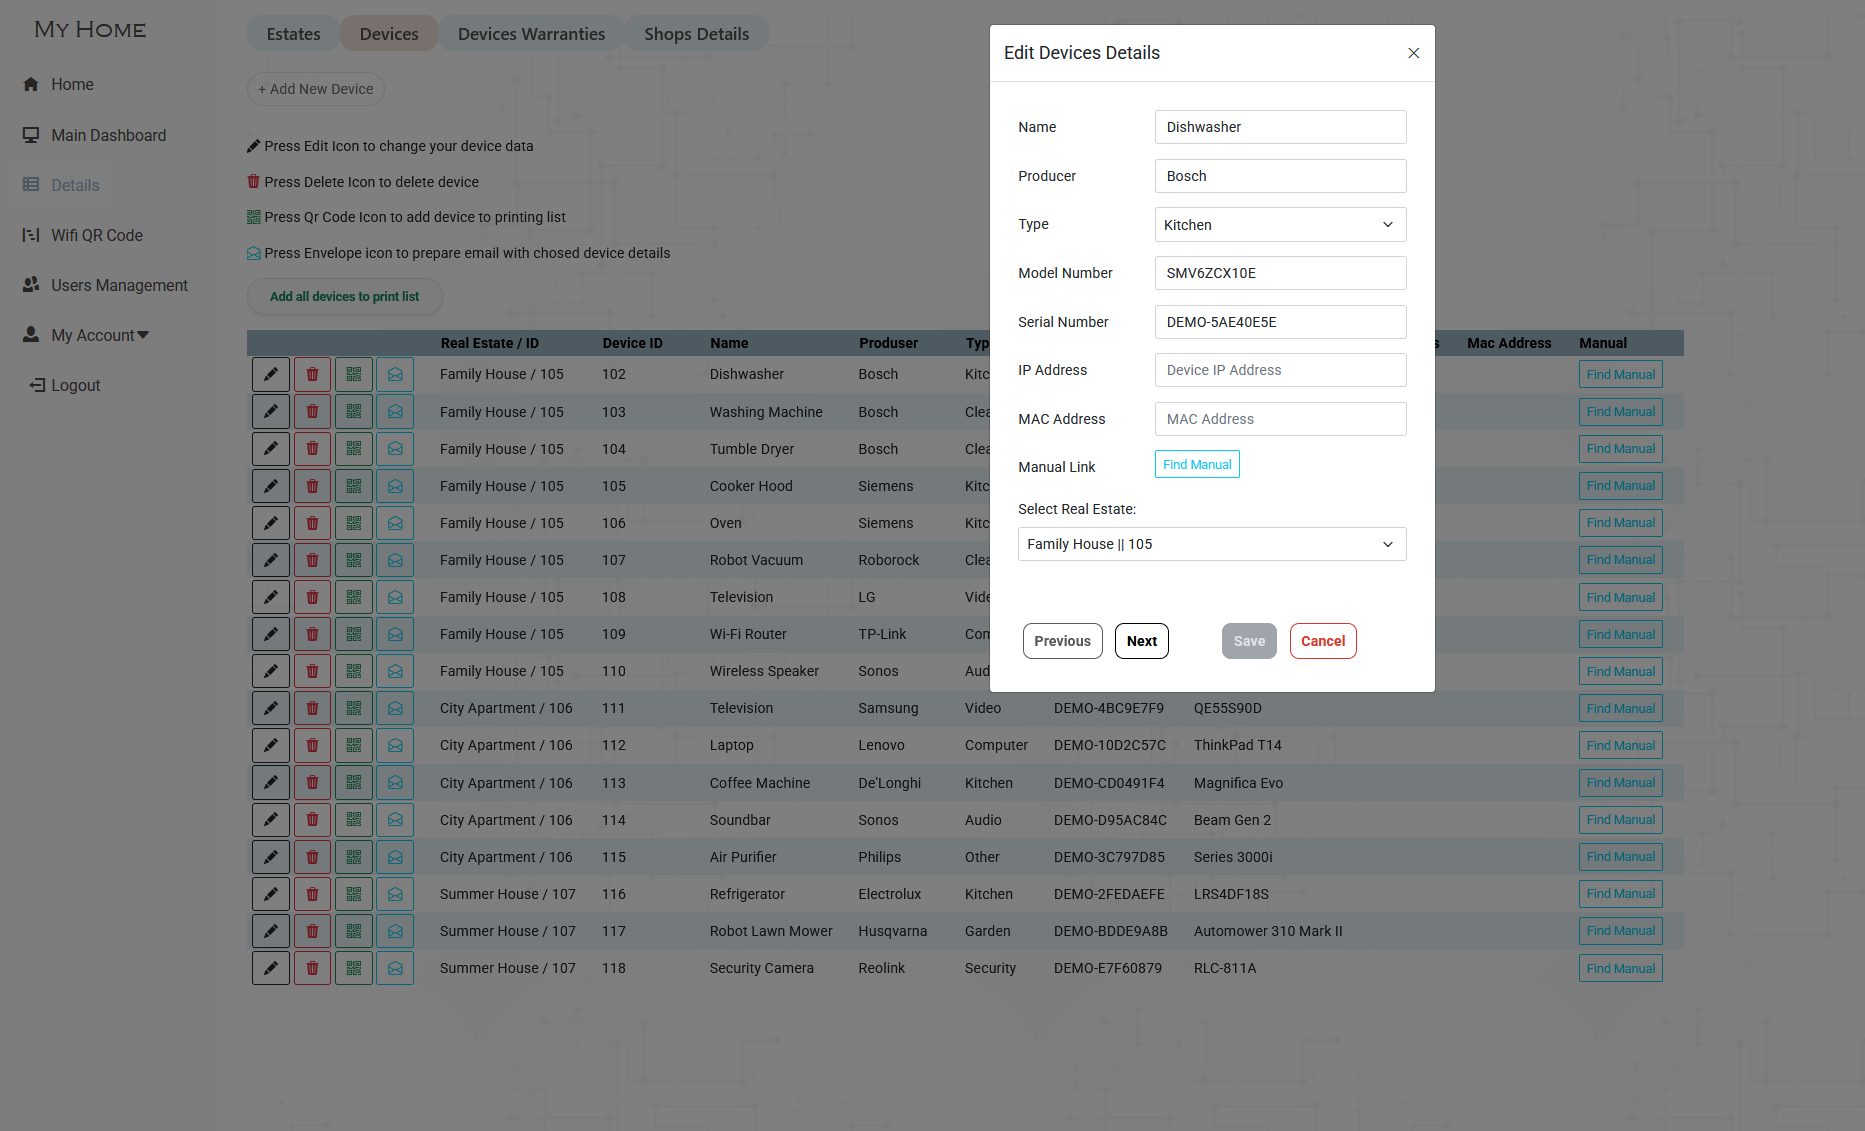
Edit Device
Device information can be updated at any time. Users can edit details such as the device name, type, manufacturer, model, serial number, IP address, MAC address, and assigned real estate.
Delete Device
Before a device is permanently removed, MyHome displays a confirmation dialog to help prevent accidental deletion.
Device QR Codes
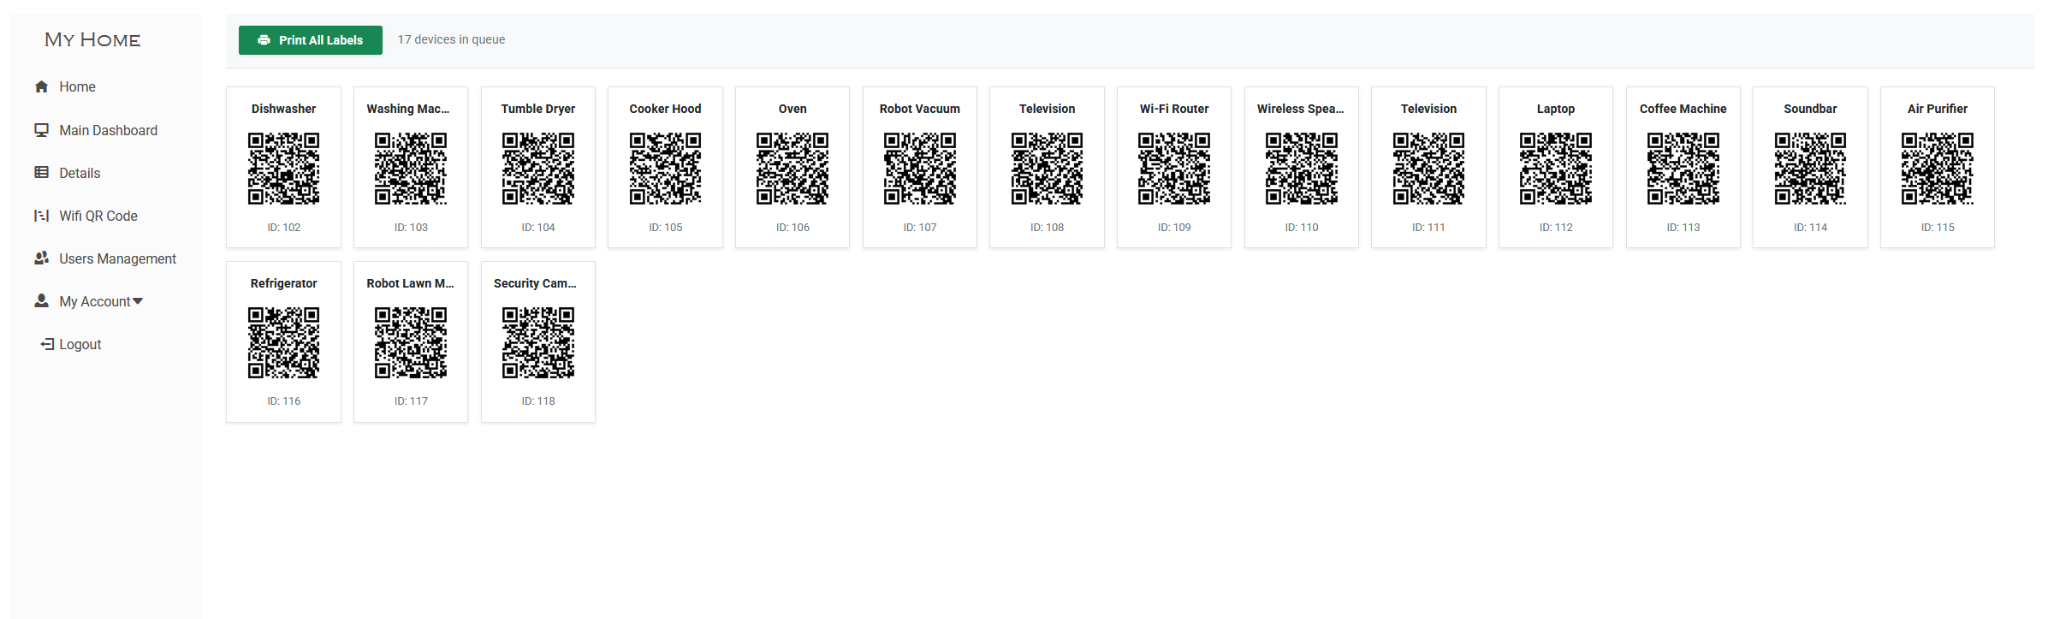
MyHome can generate QR codes for registered devices. Each QR code provides a quick way to identify a physical device and access its information in the application.
Print QR Codes
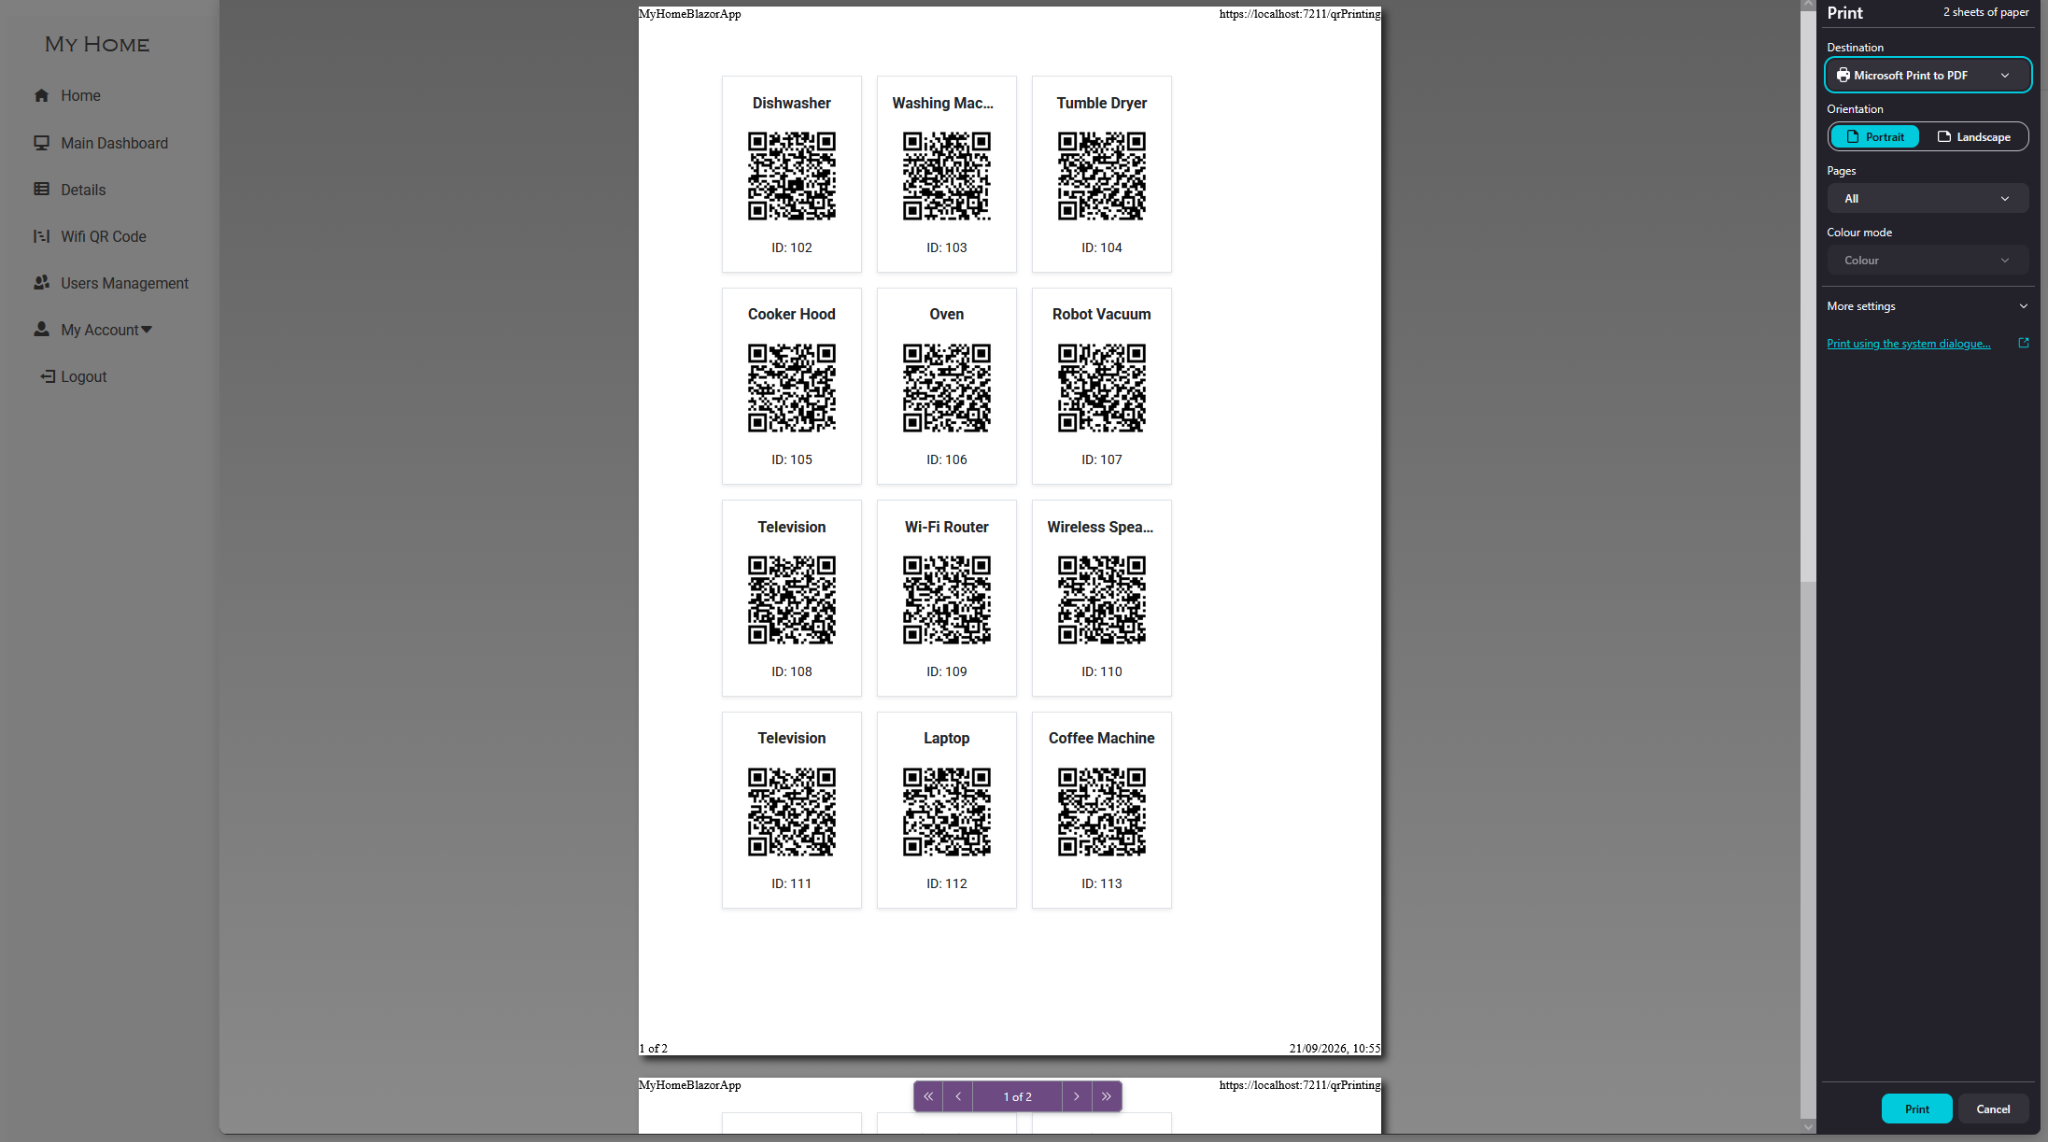
Generated QR codes can be prepared for printing directly from the application, making it possible to create physical labels for devices around the property.
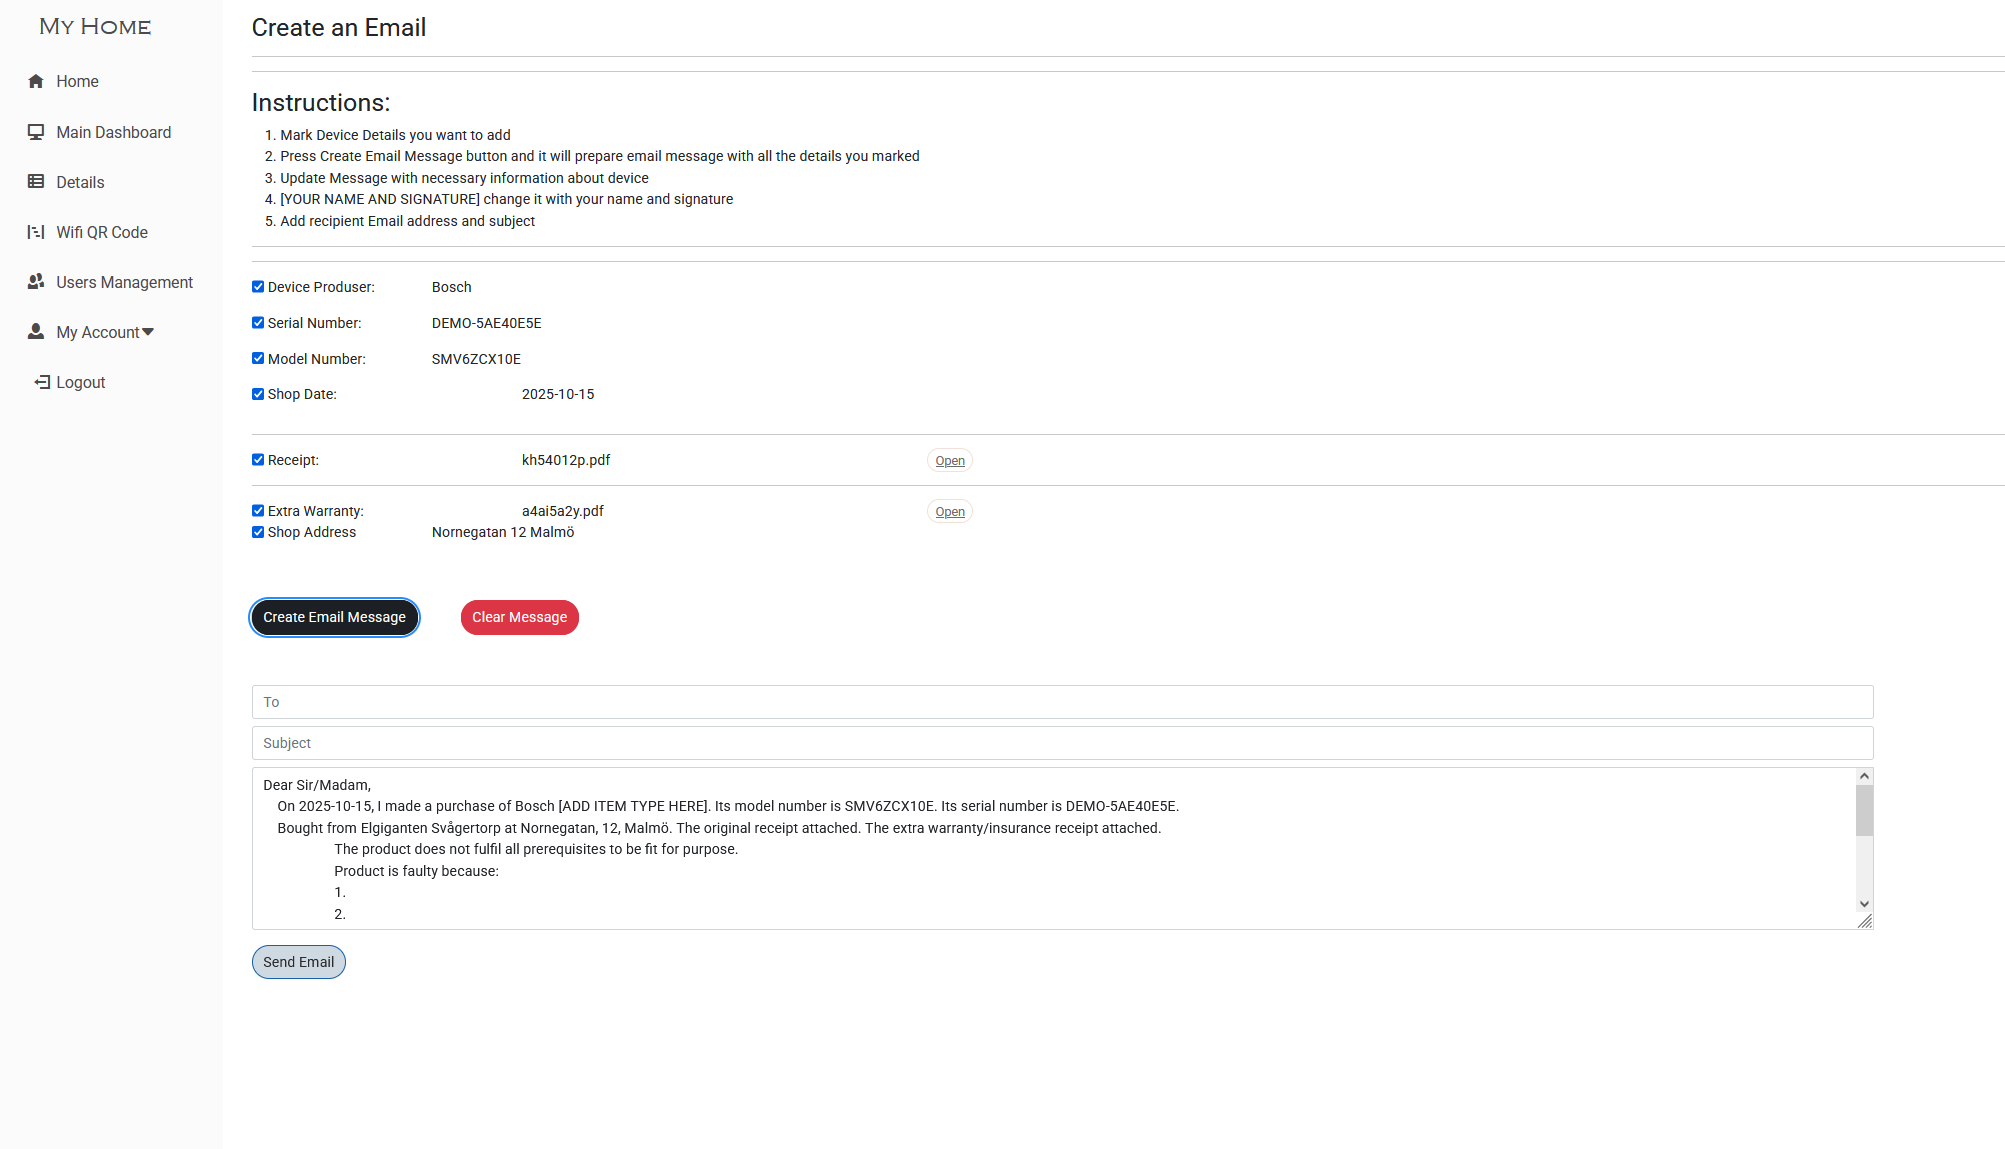
Create Device Email
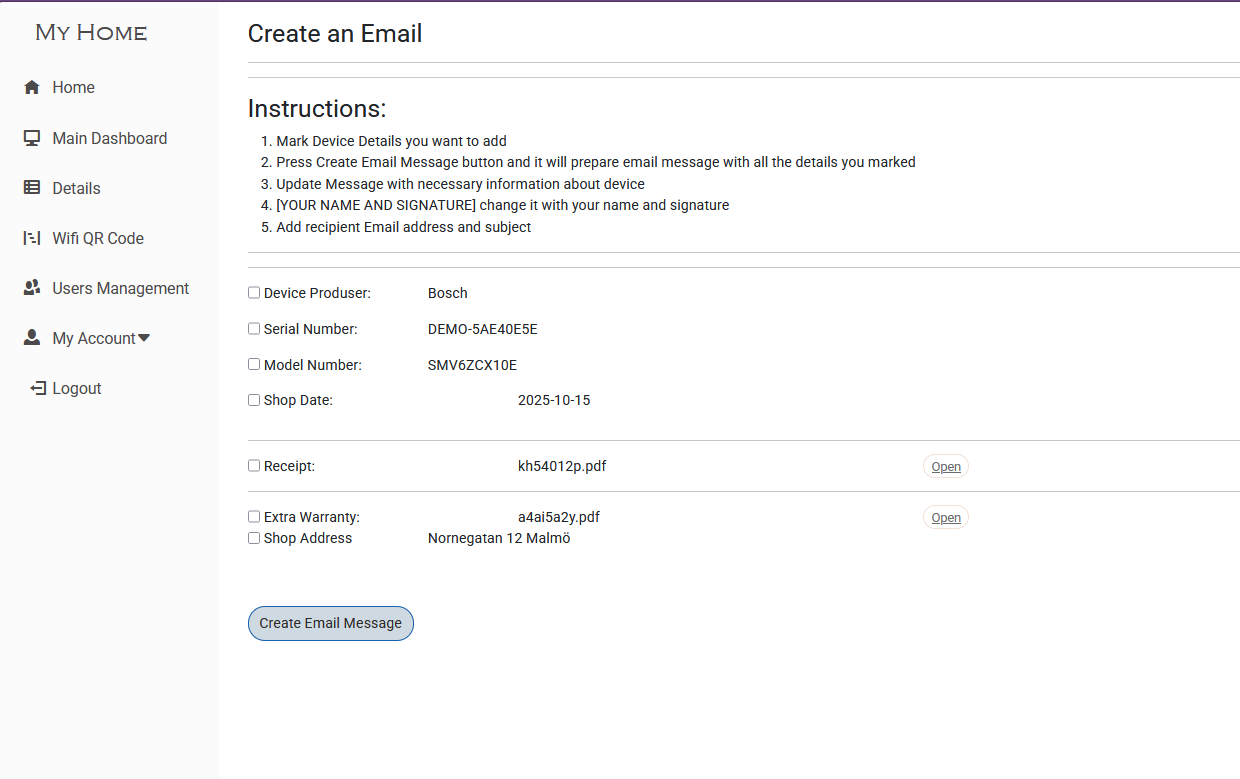
Users can select device information and generate an email containing the relevant details. This can be useful when contacting a retailer, manufacturer, service company, or other support provider.
Generated Email
MyHome automatically prepares the selected device information in an email, reducing the need to manually copy model numbers, serial numbers, and other device details.
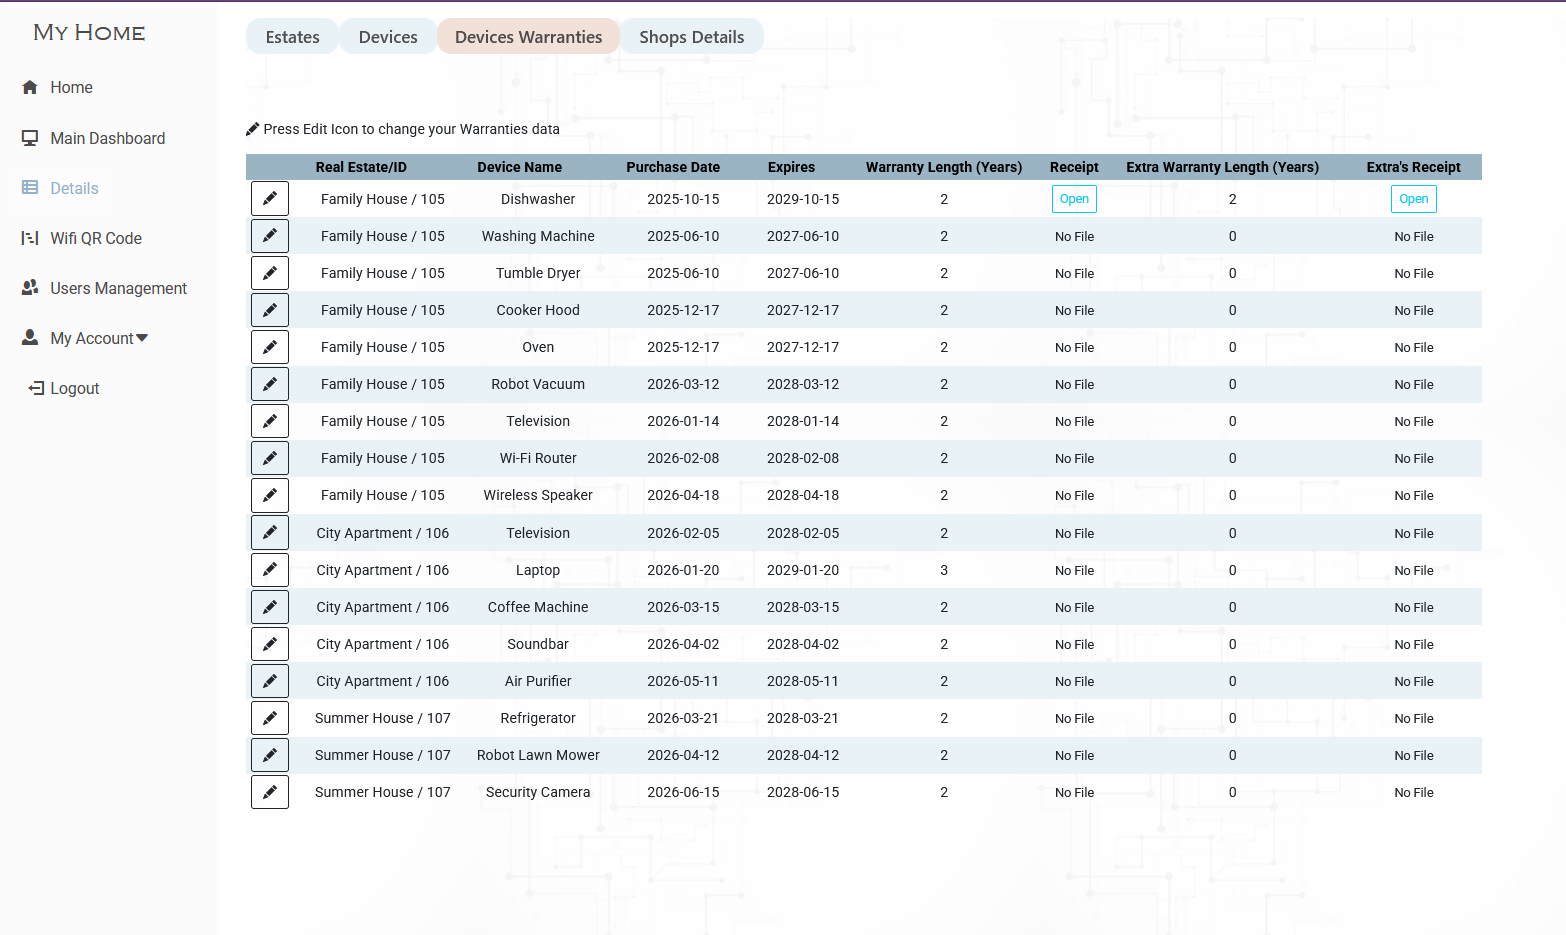
Device Warranty Management
The Device Warranties section keeps warranty and purchase information connected to each registered device. Users can store the purchase date, warranty period, extended warranty information, receipts, and insurance documents. This makes it easier to find important documentation and monitor upcoming warranty expiration dates.
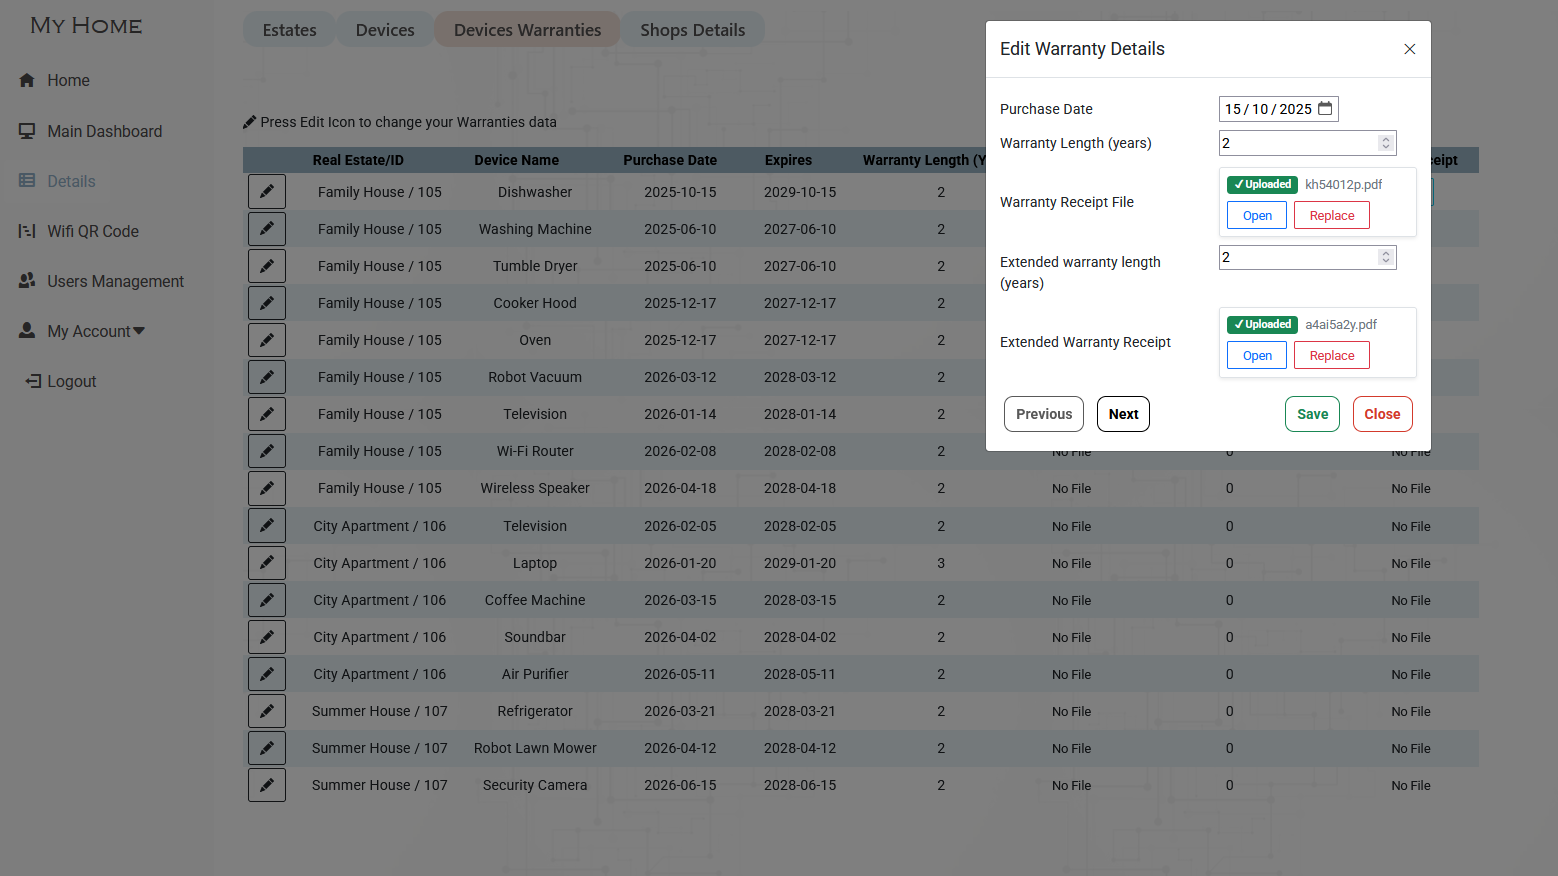
Edit Warranty Details
Warranty information can be updated directly from the warranty overview. Users can change the purchase date, warranty length, and extended warranty period. MyHome automatically calculates the warranty expiration date based on the stored warranty information.
Warranty receipts and extended warranty documents can also be uploaded and stored with the device. Existing documents can be opened or replaced, keeping purchase and warranty documentation easily accessible in one place.
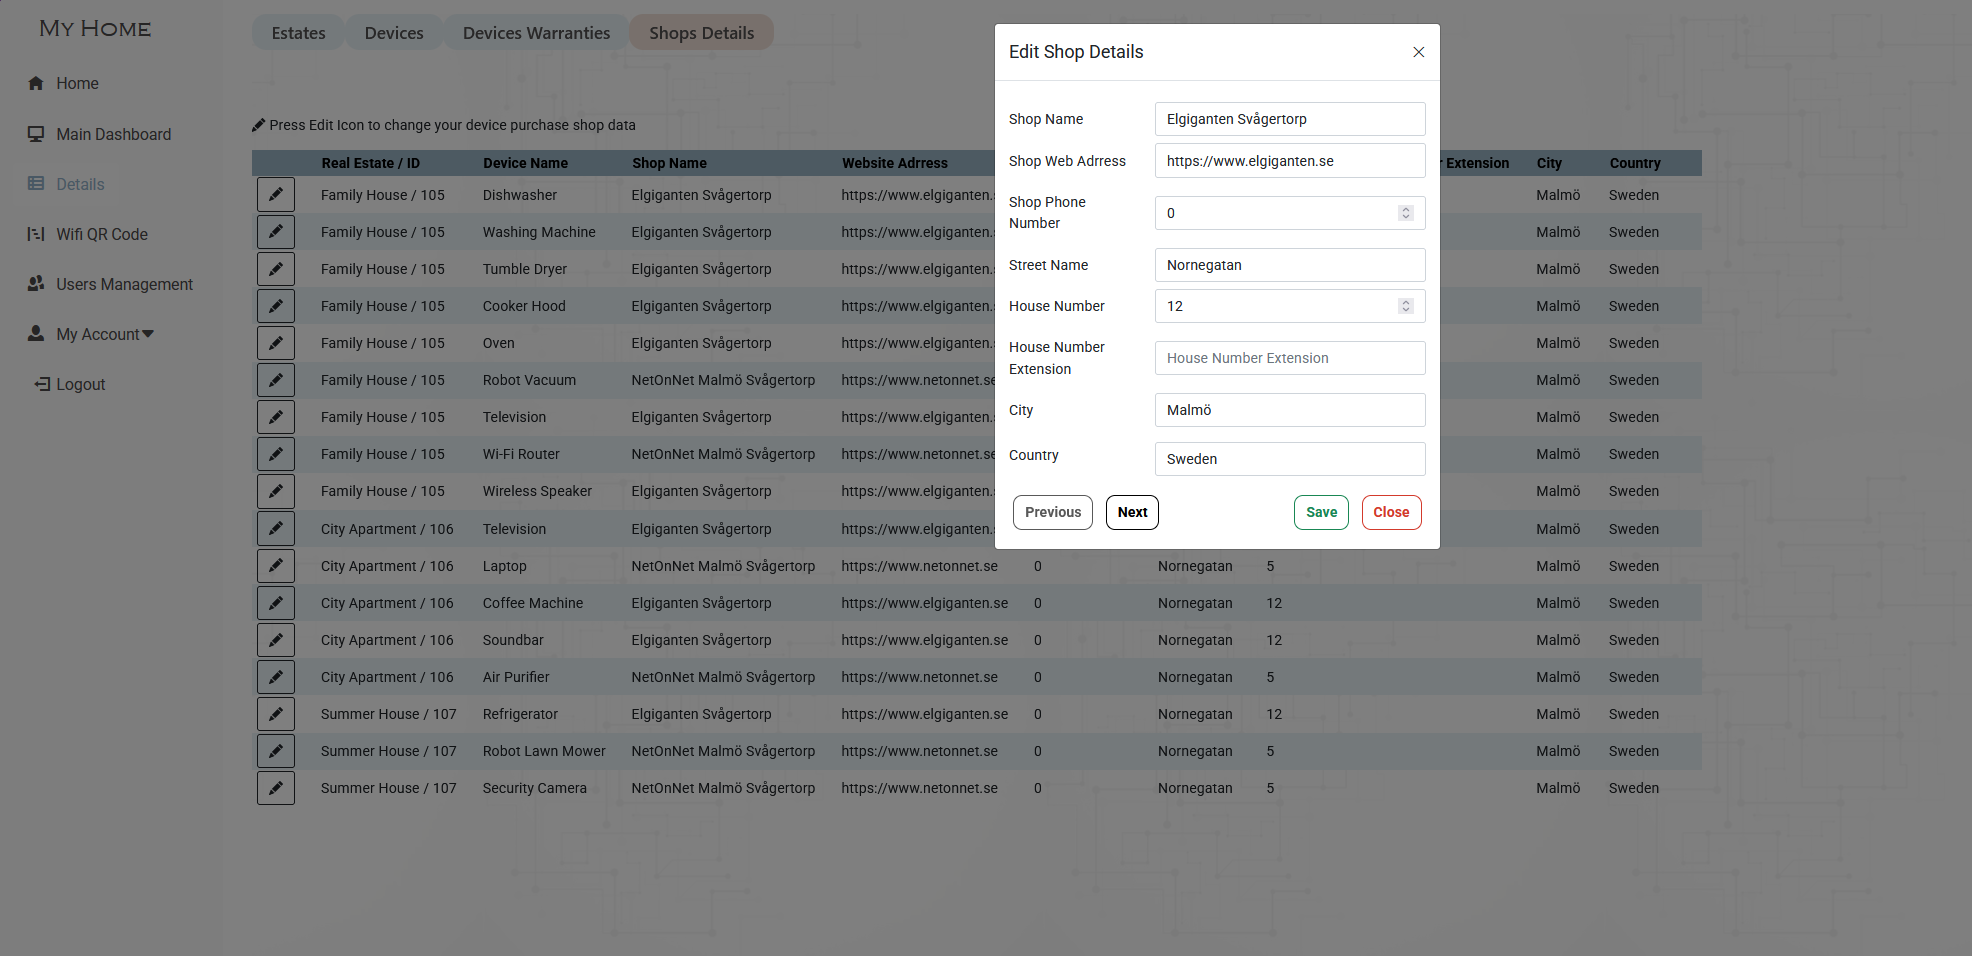
Shop Details
Purchase shop information is connected to registered devices. Users can view and update the shop name, website, phone number and address, keeping purchase information together with the corresponding device and warranty data.
Wi-Fi QR Code Generator
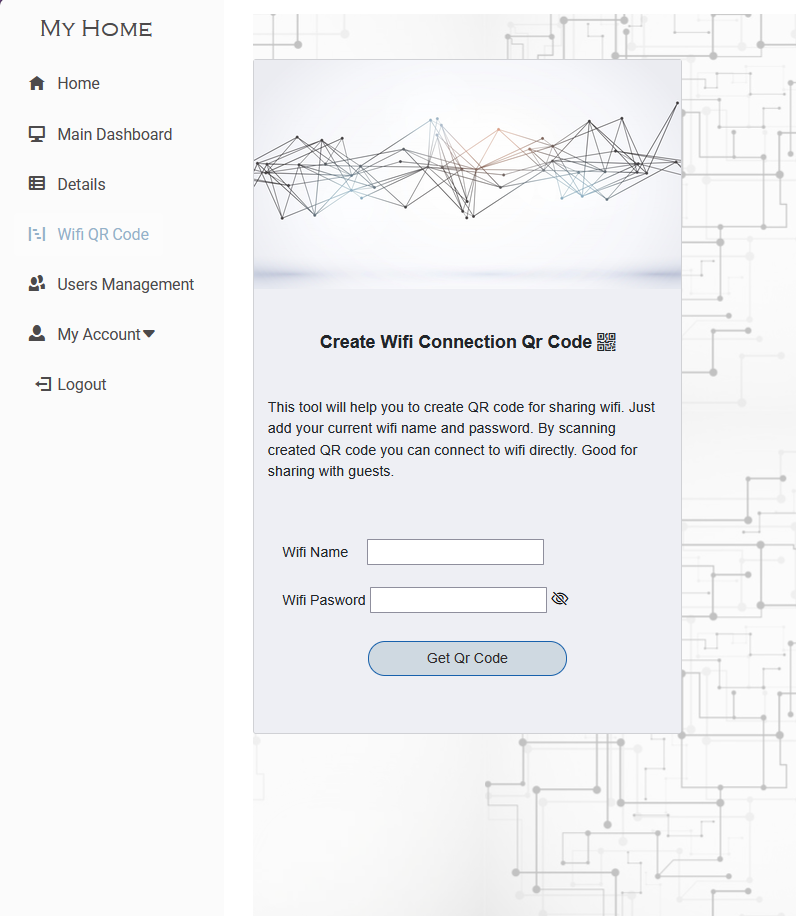
MyHome includes a tool for generating a QR code from a Wi-Fi network name and password. The generated QR code can be scanned by another device to simplify connecting to the network.
User Management Dashboard
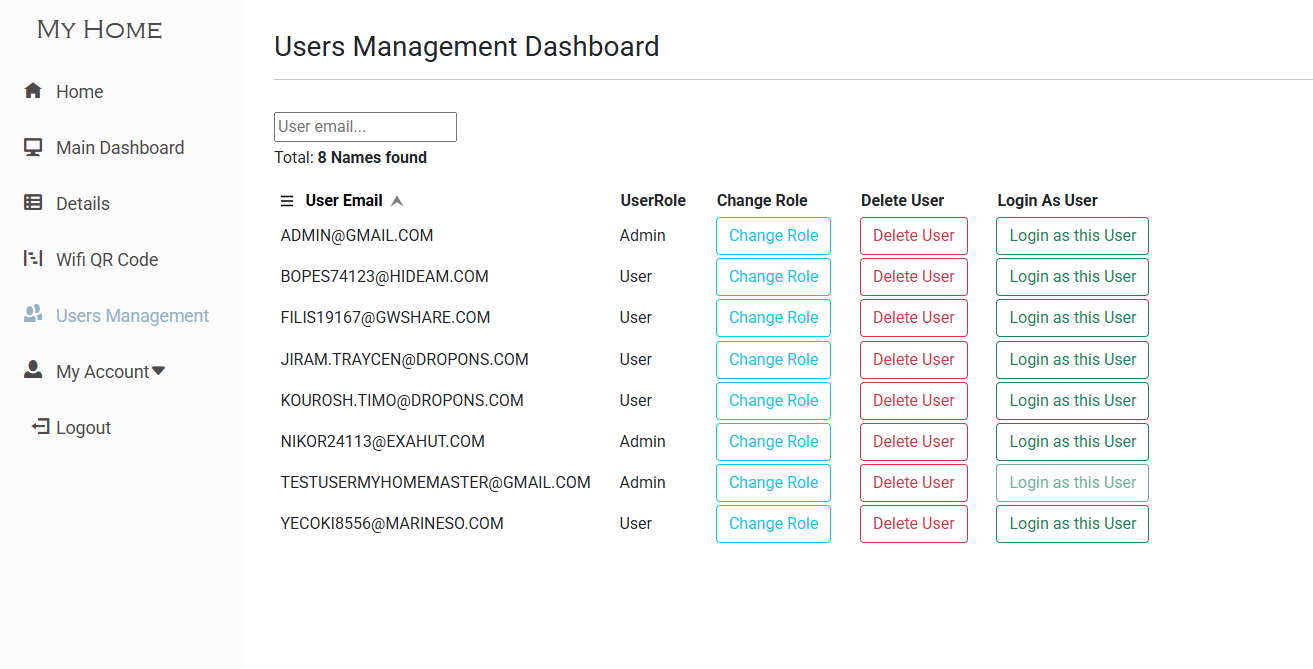
Administrators can manage registered users from a dedicated dashboard. Users can be searched, assigned roles, deleted, or temporarily accessed for support and troubleshooting.
Role Management
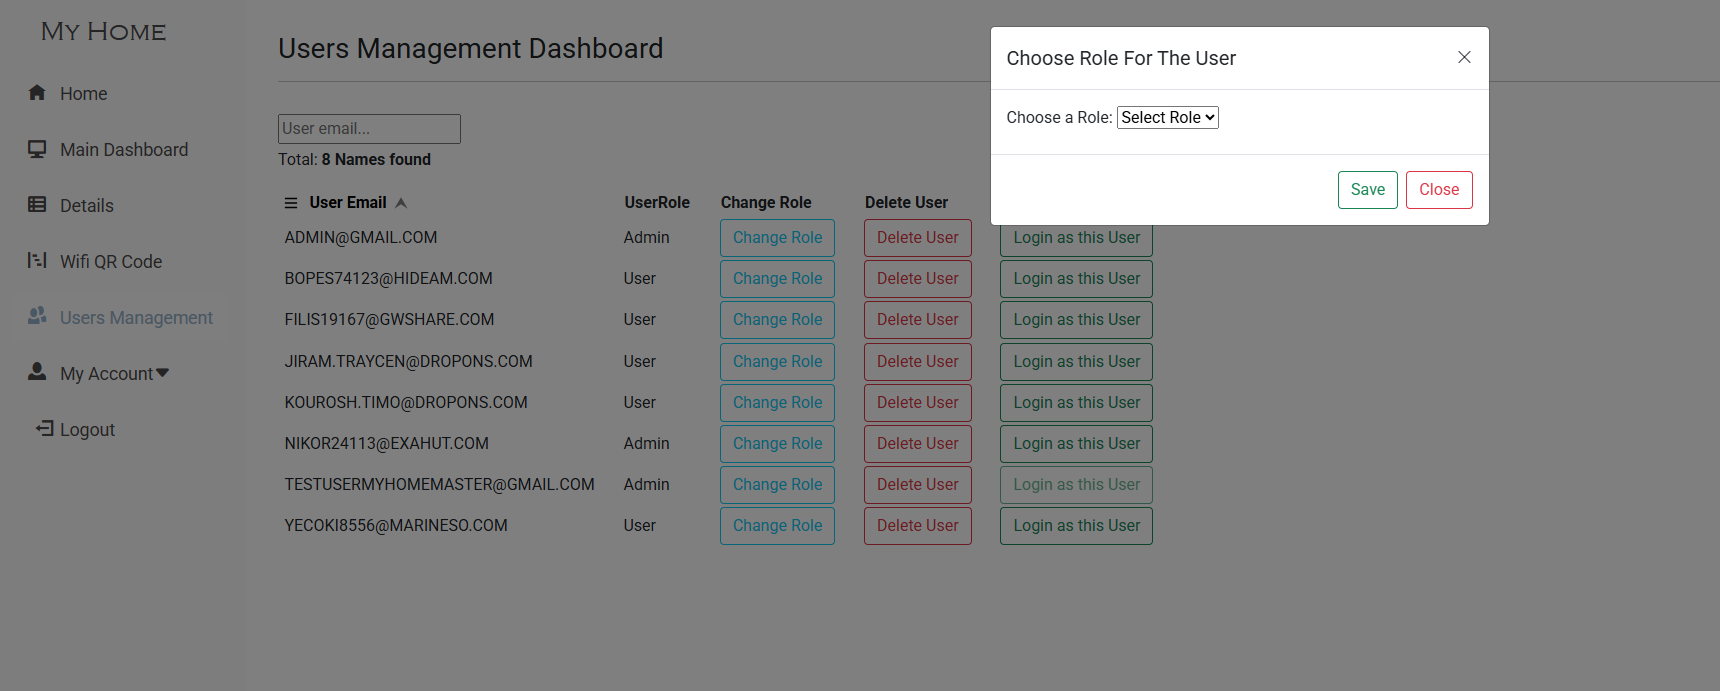
Administrators can change a user's role directly from the user management dashboard. Role-based authorization is implemented using ASP.NET Core Identity.
Delete User
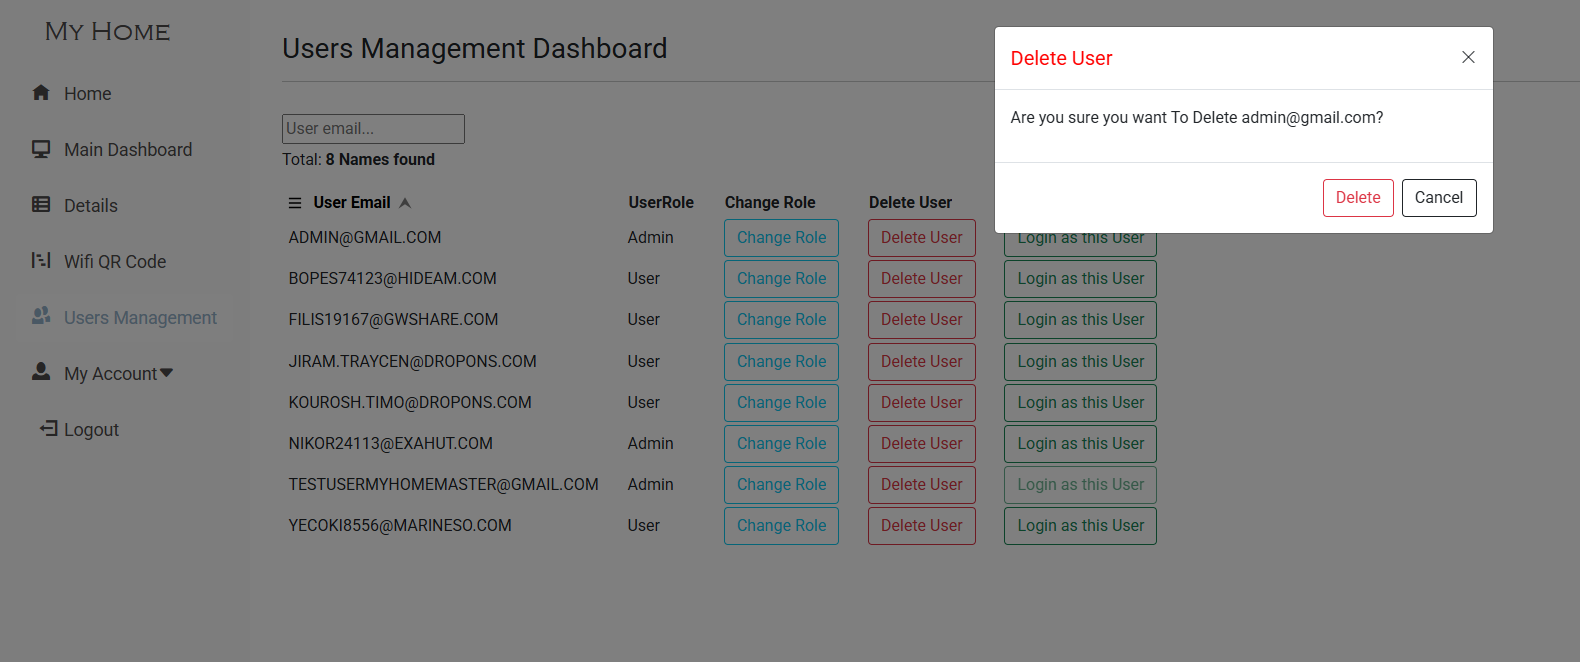
User deletion requires confirmation before the account is removed, helping prevent accidental administrative actions.
Login as User
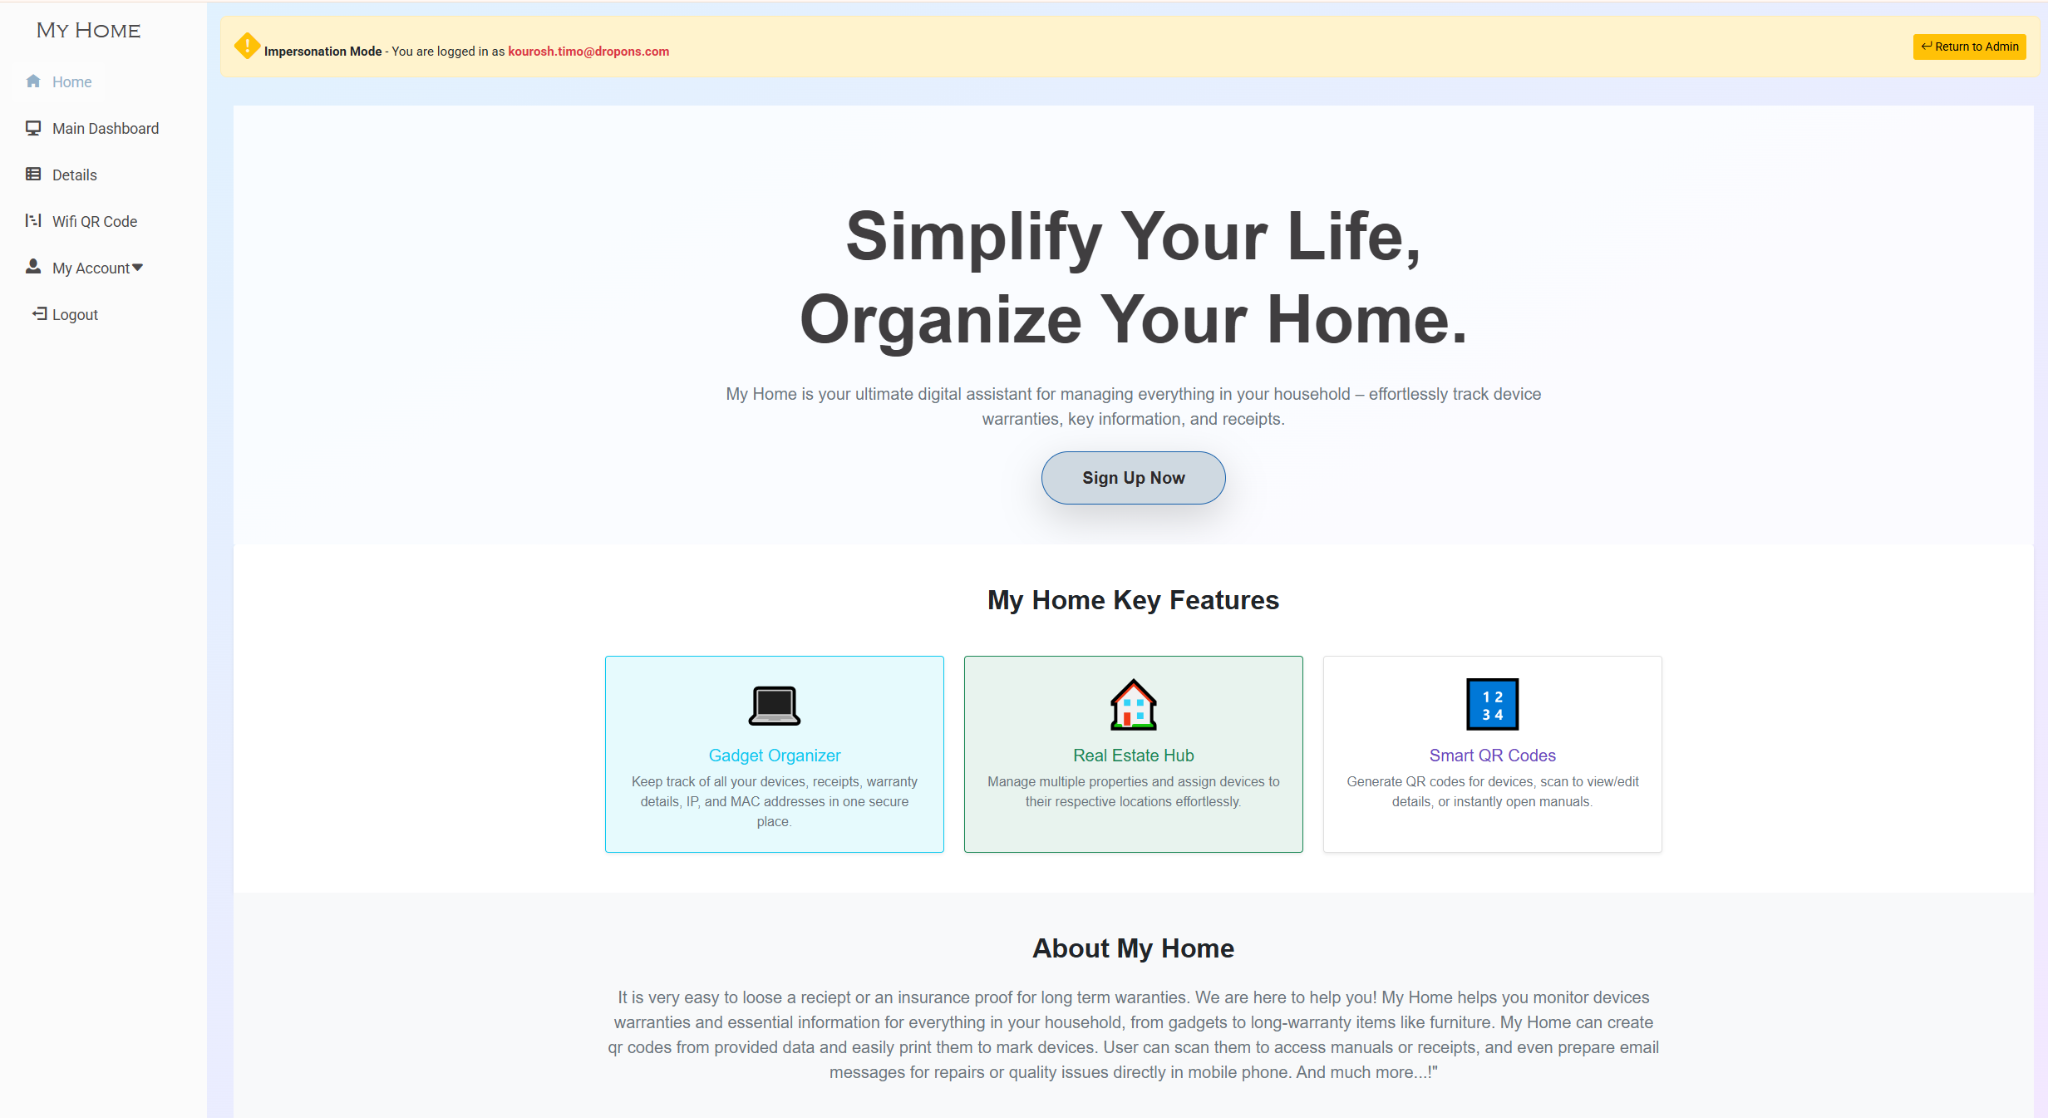
Administrators can temporarily access the application as another user for support and troubleshooting. While impersonation mode is active, a visible banner identifies the current user and provides an option to return to the administrator account.
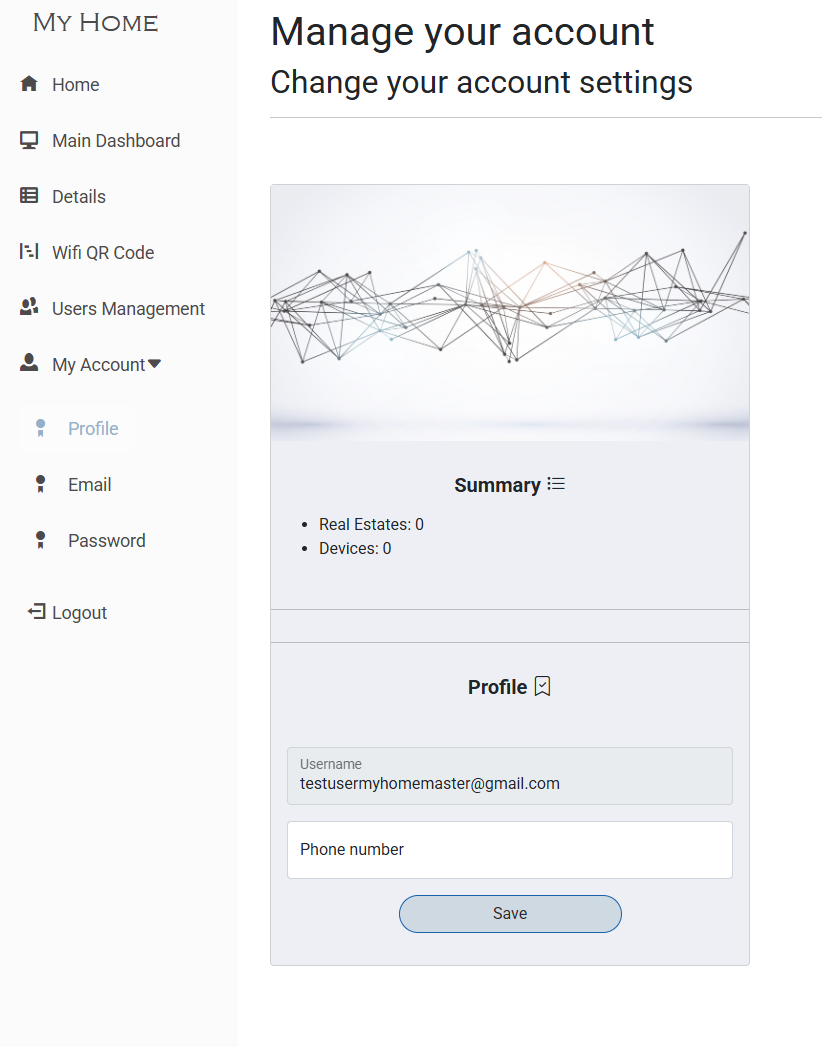
Account Overview
Users can manage their personal account information from the account area. The overview also displays a summary of the user's registered real estates and devices.
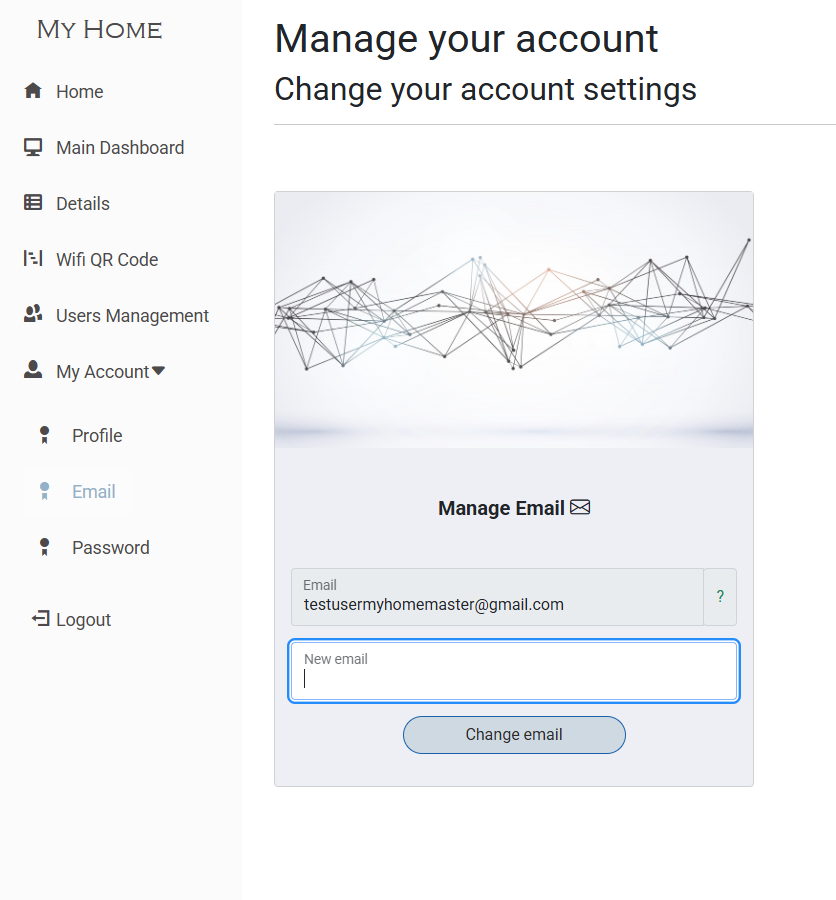
Email Management
Users can view their current email address and update it through the account management interface.
Password Management
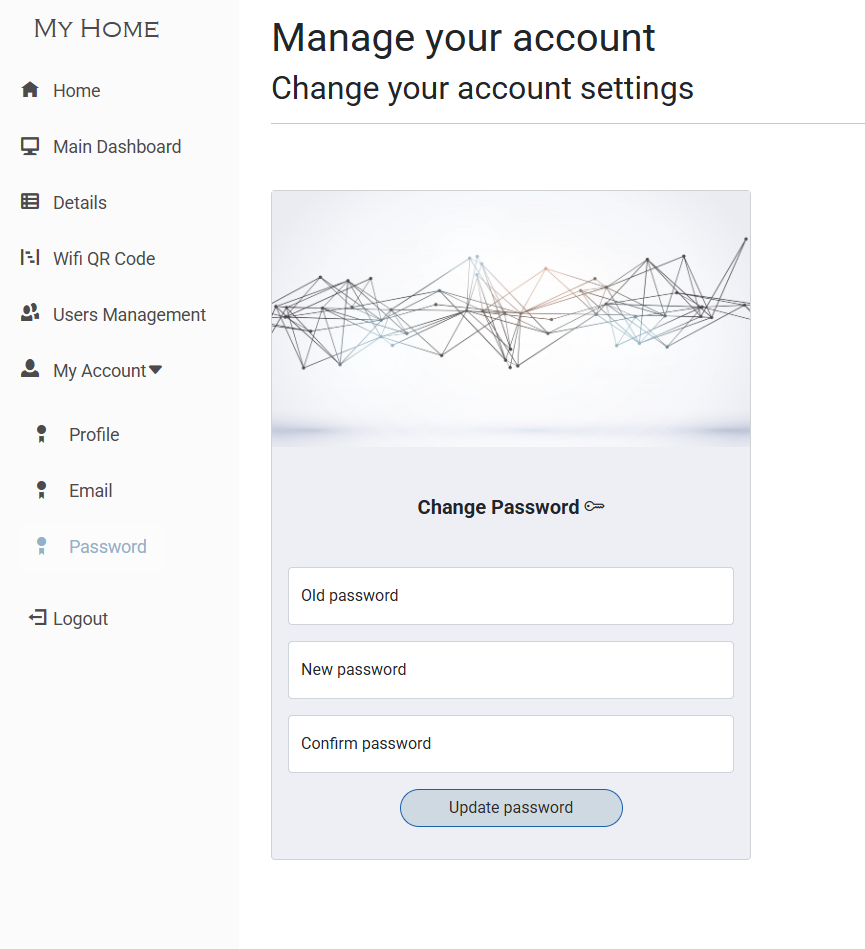
Users can securely change their password by providing their current password and confirming the new password.